
Overview
This section provides an overview of the following topics related to the Create Application page of the Annual Plan Application Submission process:
- User Roles
- Timing & Dependencies
- Application Number
- Copy a Previous Application
- Modifying Application Information
User Roles
The Account Manager and the Authorized Representative roles are the only Secure Website user roles permitted to start a new application and complete the Create Application page.
Timing & Dependencies
An application can be created at any time after the Plan Sponsor account has been activated. Refer to Manage a Plan Sponsor Account for information on that topic.
Plan Sponsors can create new applications in two different ways. The Plan Sponsor can either create a new application by entering all new application information, or the Plan Sponsor can create a new application by copying information from an existing prior application. A copied application retains all of the original application's Benefit Options, Actuary assignments, and Banking Information, but allows the Plan Sponsor to modify any application information that may be changing for the new Plan Year.
Once the application is created, the remaining sections of the Annual Plan Application Submission process become available, including Benefit Options, Actuary, Banking Information, Manage Retirees, and the Review and Submit. Refer to Important Application Deadline Information for the list of published Application Deadlines and other important information on this topic.
Once an application is created, it cannot be deleted. Refer to Delete an Application for important information on this topic.
Application Number
The system will assign an Application ID after the Save button is selected and the application is successfully created. Note:
- The Application ID is the primary identifier for all application activities and cannot be changed.
- Always use the Application ID when exchanging data with CMS’ RDS Center and Vendors. This includes retiree lists, cost reports, appeals, support requests and email correspondence.
Copy a Previous Application
Plan Sponsors have the option to use an historical application as a template to create a new application. When sponsors copy a previous plan year’s application, much of the information in the previous application will be carried forward into the new application so the user doesn’t need to re-enter information that doesn’t change year after year. Some information is not able to be carried forward.
When a previous application is copied, the Secure Website will pre-populate the Start Date and End Date fields with the anticipated Start and End Dates for the new application based on the Plan Year of the original copied application. The fields are editable in the event the Plan Sponsor elects to use different Plan Year Start and End dates than those suggested by the Secure Website. Once the Save button is selected, the dates cannot be changed, and the Application information is refreshed with applicable status and deadline information.
Information That is Copied:
- The Application Name field is pre-populated with the same Application Name as the copied application and can be edited.
- The Benefit Options are copied with the same Benefit Option Name, UBOI, Type, and Retiree Submission Method but can be edited or deleted. New Benefit Options may be added as well.
- The Actuary is copied over if their user account is Active. The Actuary may be changed or removed. Inactive and Expired Actuary accounts are not carried forward.
- Banking Information is copied over and can be edited.
Information That is Not Copied:
- Attestation - The Actuary is required to attest each plan year application separately.
- Plan Sponsor Agreement - The Authorized Representative is required to review and submit each plan year application separately.
- Valid Initial Retiree List - The Plan Sponsor is required to submit a Valid Initial Retiree List for each plan year application separately.
- Designees - The Plan Sponsor is required to assign Designees for each plan year application separately.
- Payment Setup - The Plan Sponsor is required to complete Payment Setup for each plan year application separately after the application is approved.
Modifying Application Information
The Plan Sponsor, Application Name, and Plan Year Start and End Dates may be modified until the Save button is selected and the application is successfully created.
After the application is created, the Plan Sponsor and the Plan Year Start and End Dates cannot be changed. If the Plan Sponsor needs to shorten the plan year originally submitted with the application, refer to Common Question 7000-7.
After the application is created, only the Application Name can be modified. Application Name is used by the Plan Sponsor as a title for the application; it is not communicated to CMS during data transfers. The Application Name can be changed by the Account Manager at any point in the application lifecycle.
Step-by-Step Instructions
This section provides step-by-step instructions to start a new application.
To access the RDS Secure Website and navigate to the Dashboard, review instructions to access the RDS Secure Website.
Step-by-Step Instructions: Create New Application
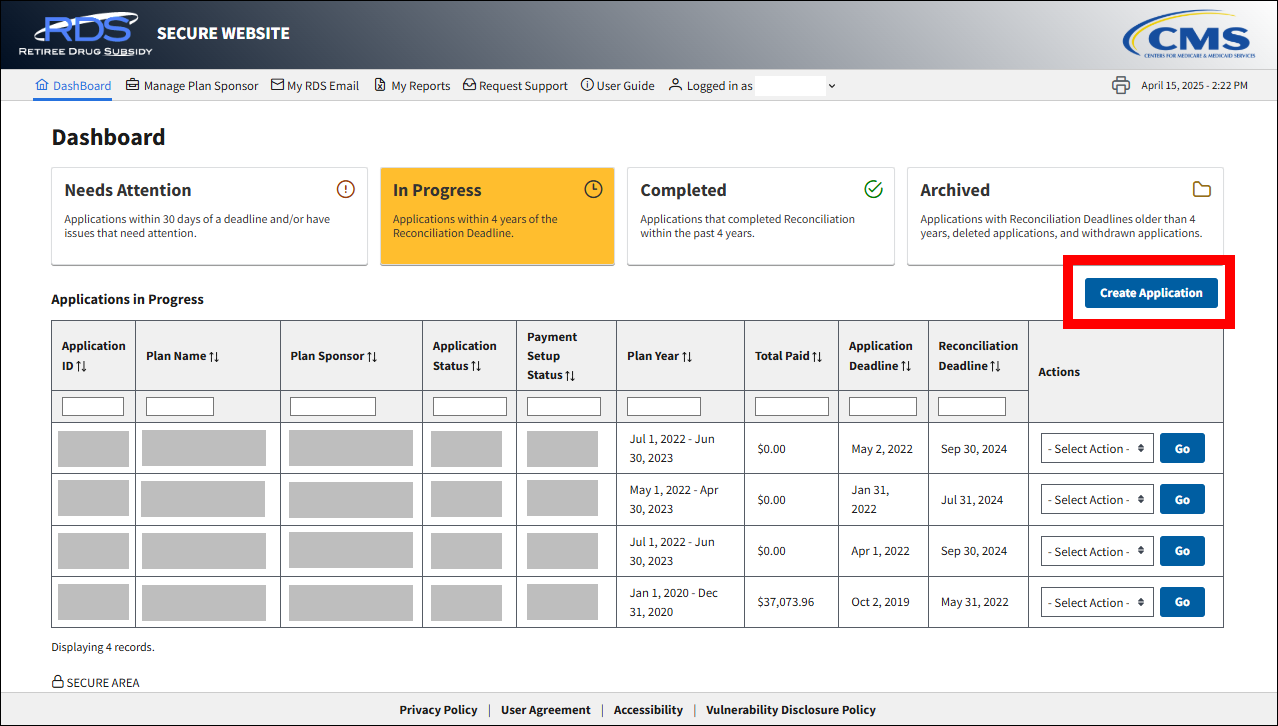
On the Dashboard page:
-
Select Create Application.
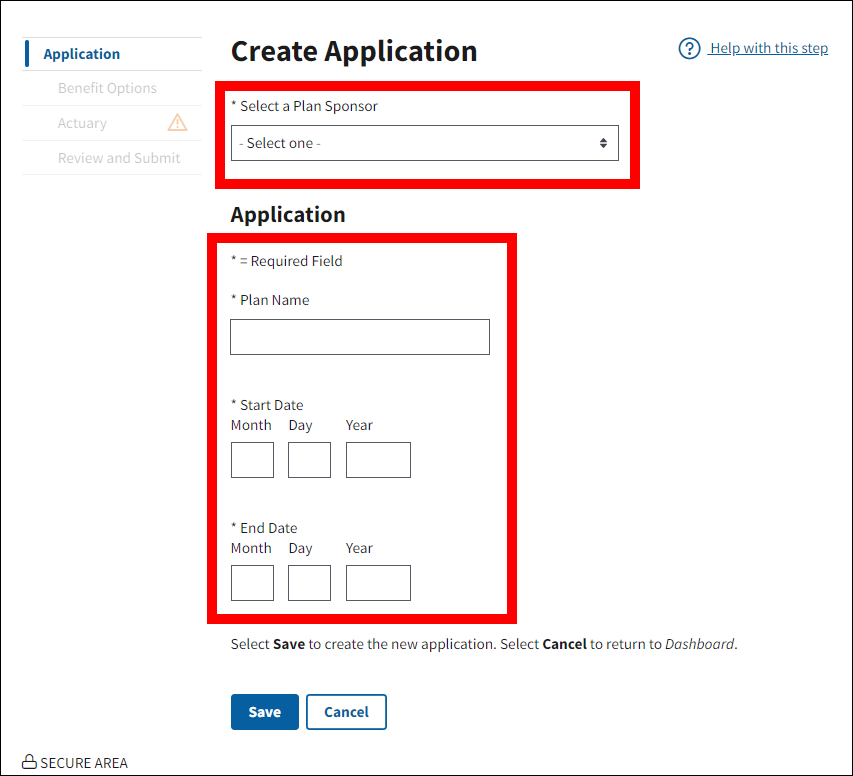
On the Create Application page:
An asterisk (*) indicates a required field.
- *Select a Plan Sponsor from the dropdown list for which you would like to start a new application.
- *Enter the Application Name.
- *Enter the Plan Year Start date – Month, Day, and Year.
-
*Enter the Plan Year End date – Month, Day, and Year.
-
Select Save to create the application, or select Cancel to return to the Dashboard without creating a new application..
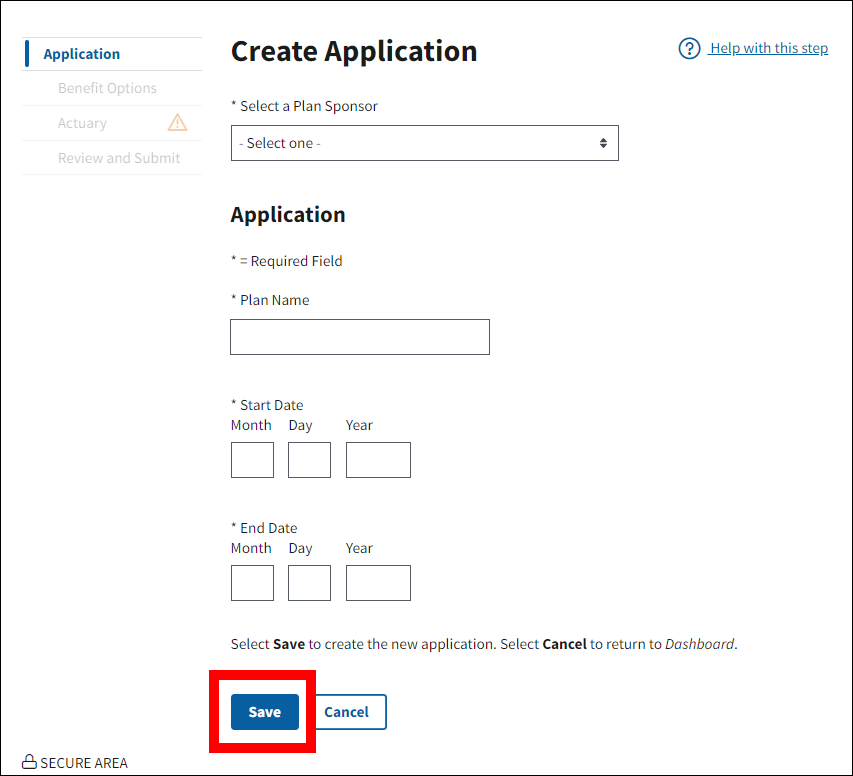
-
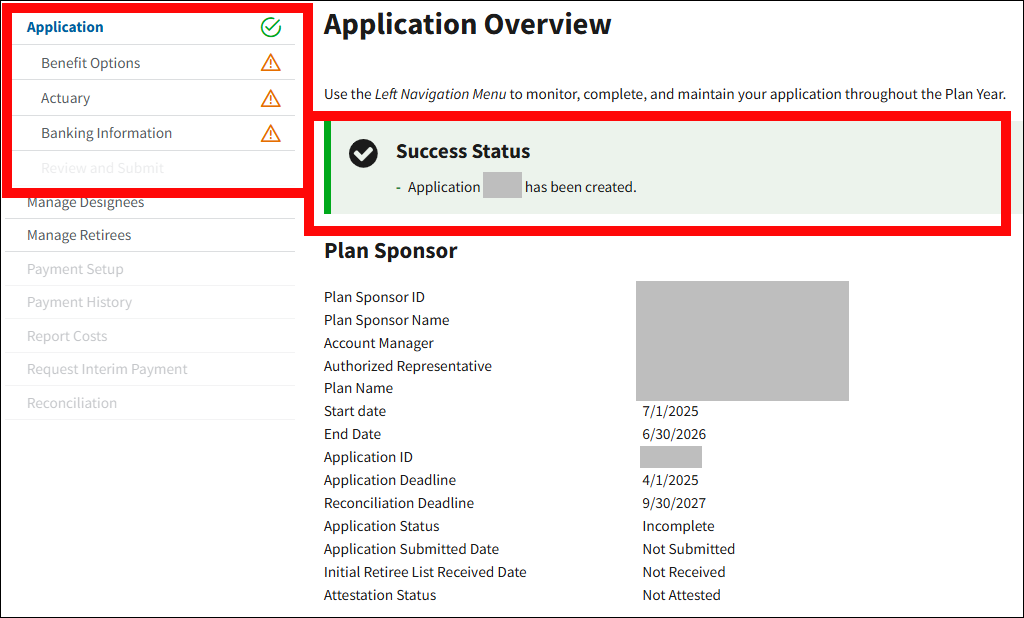
The page will refresh and a Success message will display the new Application ID. Important Plan Sponsor and application information will display on the page. A green check mark will display next to the Application section of the Navigation Menu.

Step-by-Step Instructions: Copy Prior Application to Create New Application
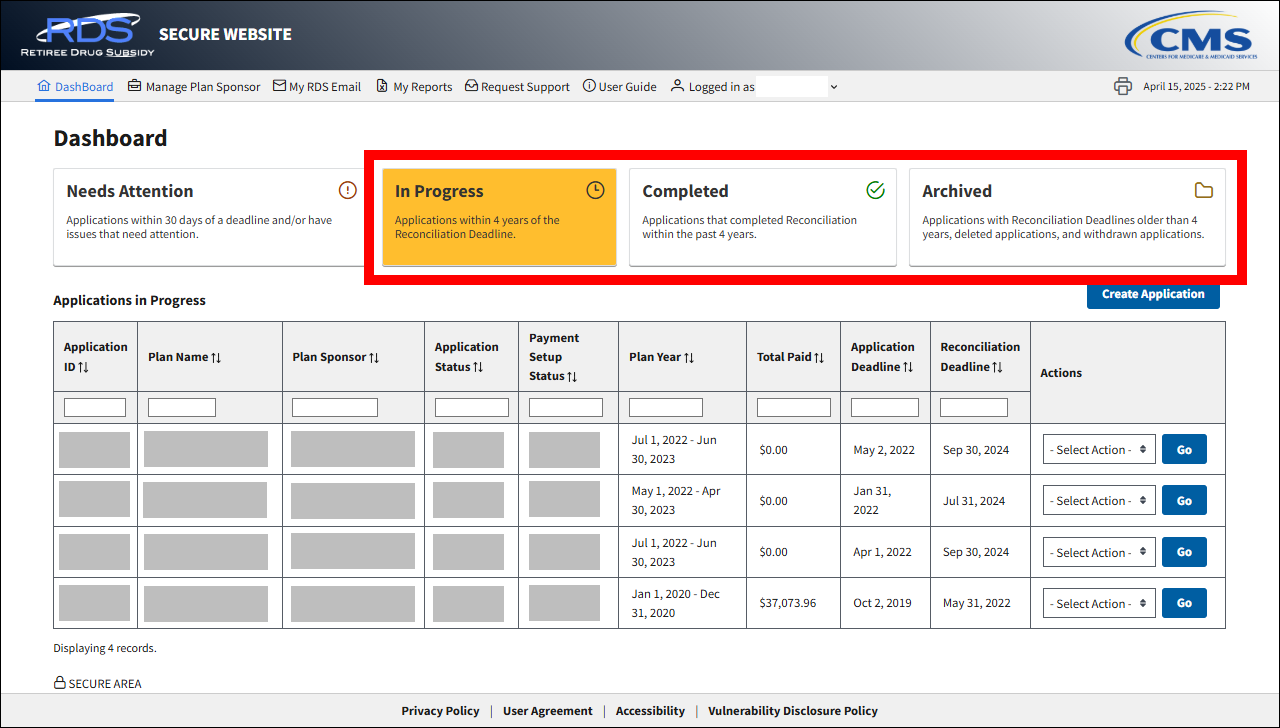
On the Dashboard page:
-
Select In Progress, Completed, or Archived to refresh the page and locate the application you wish to copy in the Applications table.
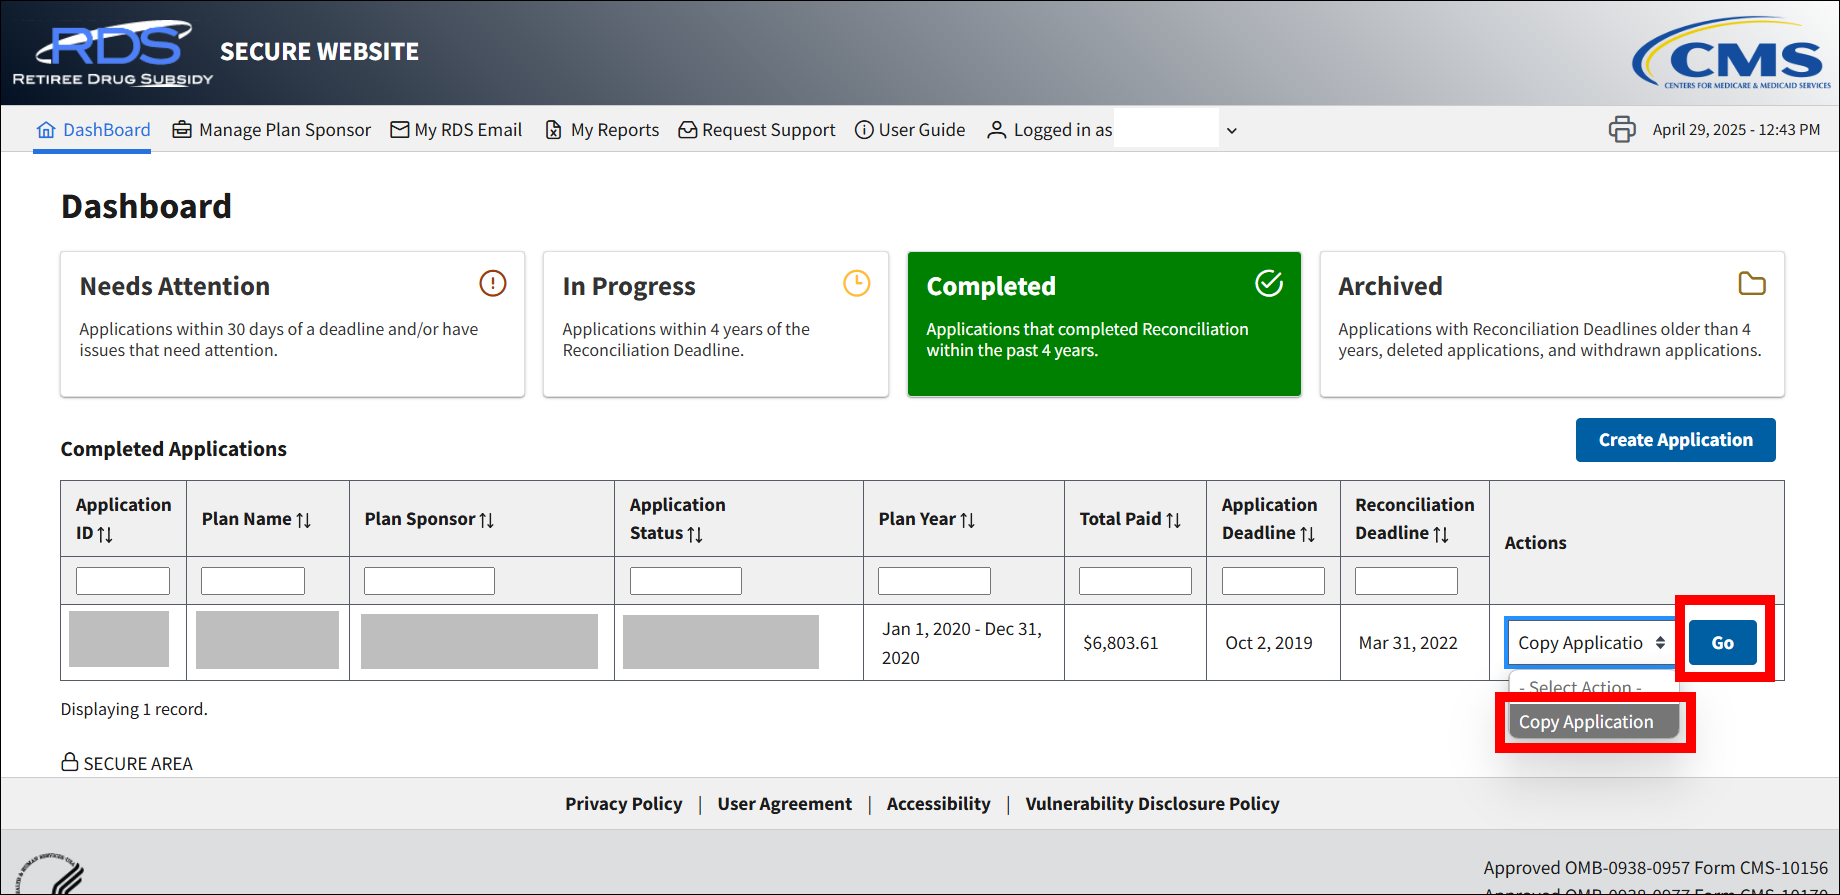
-
Select Copy Application from the Actions dropdown list for the application you wish to copy, then select Go.
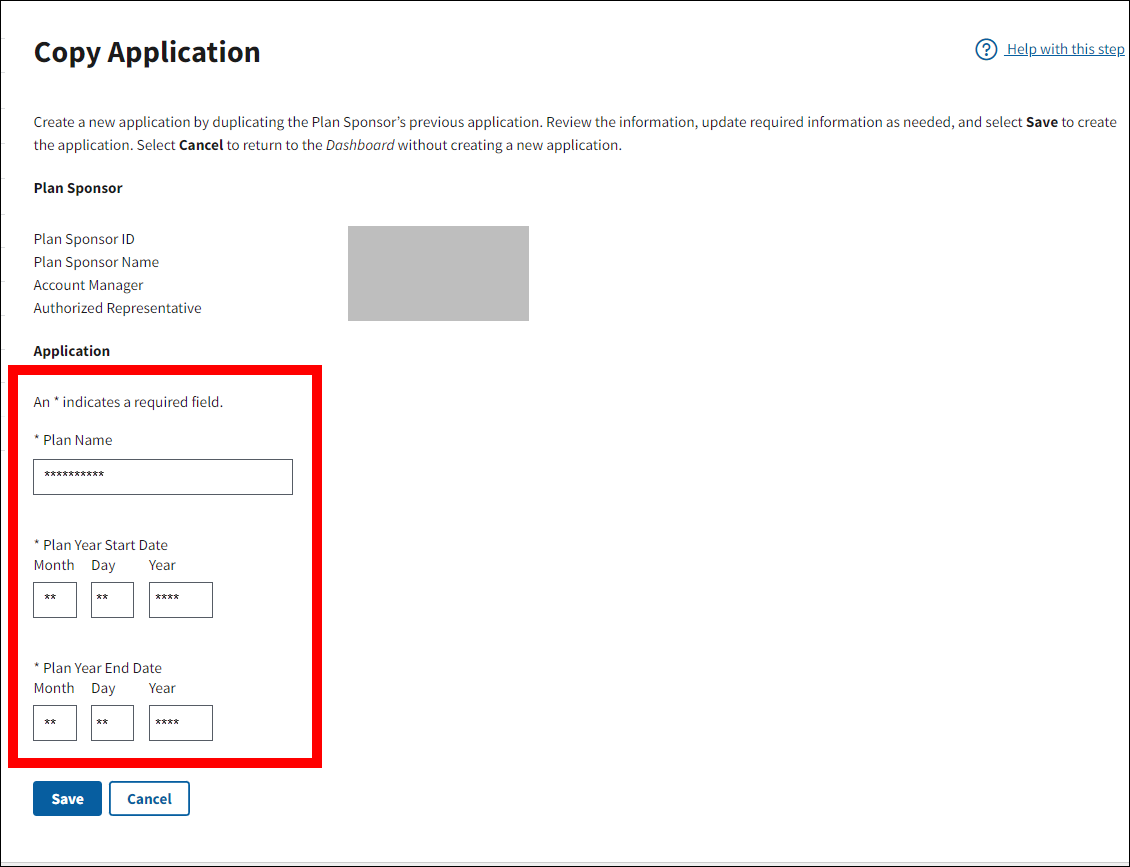
On the Copy Application page:
An asterisk (*) indicates a required field.
- *Enter the Application Name.
- *Enter the Plan Year Start date – Month, Day, and Year.
-
*Enter the Plan Year End date – Month, Day, and Year.
-
Select Save to create the application, or select Cancel to return to the Dashboard without creating a new application.
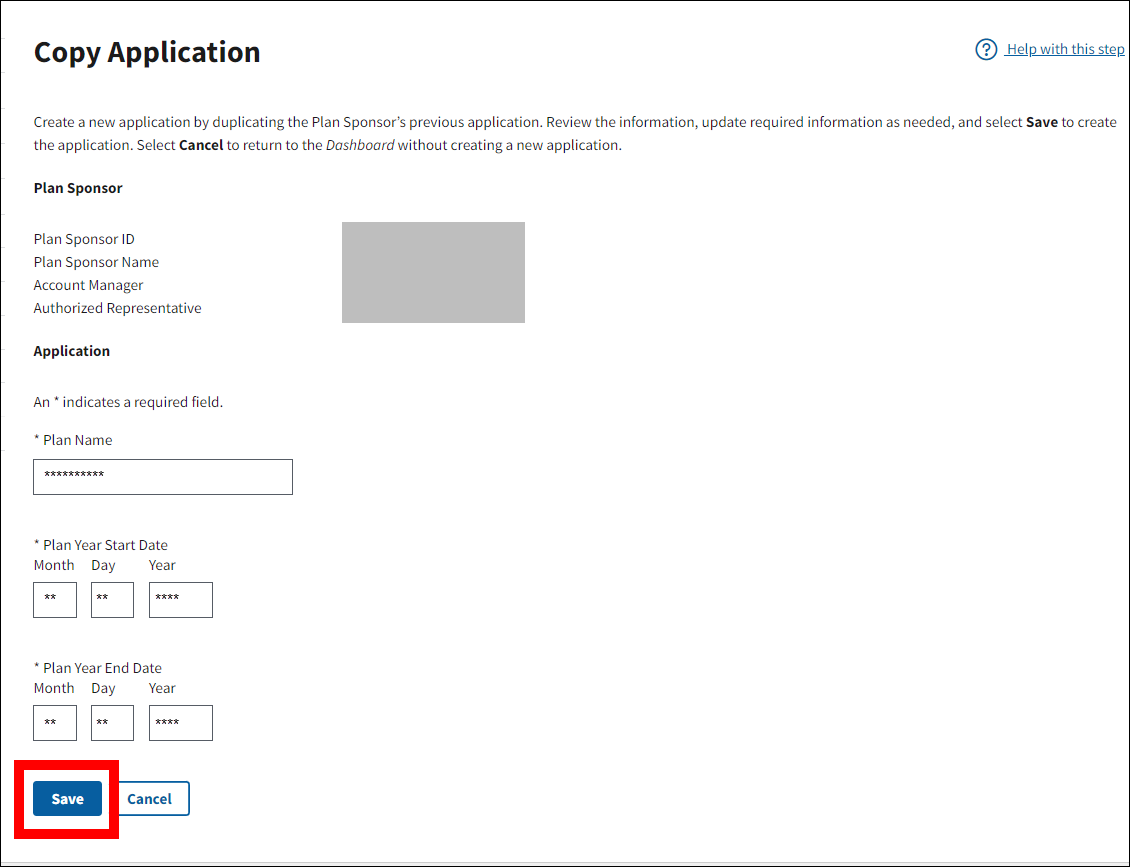
-
The page will refresh and a Success message will display the new Application ID. Important Plan Sponsor and application information will display on the page. A green check mark will display next to each step in the Application section of the Navigation Menu that successfully copied from the original application. A red exclamation point will display next to each step in the Application section of the Navigation Menu that needs attention.
Note: Any RDS users assigned to the copied application whose user accounts have expired will not be assigned to the new application. For more information on user role assignments, refer to User Management.